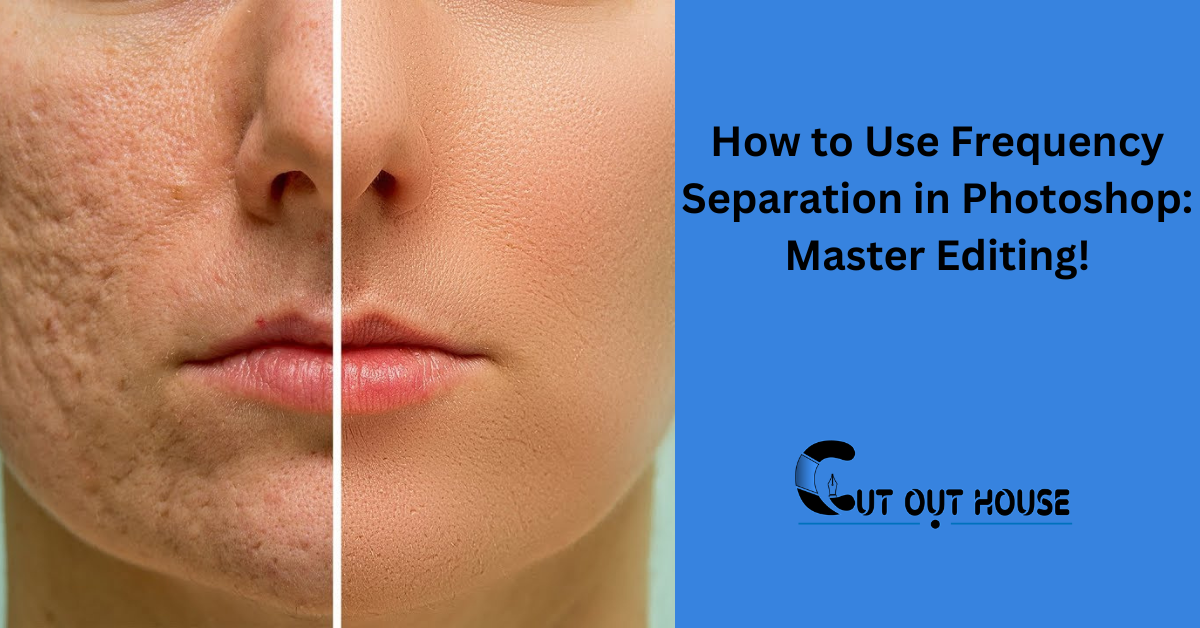
To use frequency separation in Photoshop, duplicate the background layer, apply Gaussian blur, and adjust the blend mode. This technique separates texture from color for easy retouching.
Frequency separation in Photoshop is a powerful technique that allows for precise retouching by separating texture and color. Whether you’re working on portraits or landscapes, this method can help you achieve professional-looking results. By understanding the concept and following a few simple steps, you can enhance your images and create a polished, professional look.
We’ll explore the process of using frequency separation in Photoshop and how it can elevate your retouching skills. Whether you’re a beginner or a seasoned photographer, mastering frequency separation can take your editing to the next level. Let’s delve into the world of frequency separation and discover its transformative capabilities in Photoshop.
Introduction To Frequency Separation
Learn how to use frequency separation in Photoshop for advanced retouching techniques. This powerful tool allows you to separate the texture and color of an image, making it easier to retouch specific areas without affecting the overall quality. Enhance your editing skills with frequency separation in Photoshop.
| Benefits for Photographers and Retouchers |
|---|
| -Ability to remove blemishes and imperfections while preserving skin texture |
| -Allows for targeted adjustments of specific areas’ texture without affecting color and brightness levels |
| -Enables photographers and retouchers to achieve a more professional and polished look in their images |
Preparing Your Image
Before diving into frequency separation in Photoshop, it is important to select the right image. Choose an image that has good overall lighting and minimal distractions. This will make the separation process easier and produce better results.
Before applying frequency separation, make sure to perform some initial adjustments to your image. This may include basic exposure and color corrections, cropping, and straightening. By doing these adjustments beforehand, you can enhance the overall appearance of your image and make the separation process more effective.
Creating The Frequency Separation Layers
To use frequency separation in Photoshop, start by creating the frequency separation layers. Begin by duplicating the background layer and then applying Gaussian Blur to the bottom layer. After that, select the top layer and open the Apply Image dialog box. Click OK and change the blend mode of the top layer to Linear Light. This process sets the foundation for utilizing frequency separation techniques in Photoshop.
Fine-tuning The High Frequency Layer
When it comes to frequency separation in Photoshop, fine-tuning the high frequency layer is essential. Using the Apply Image feature allows for adjusting blend modes to achieve the desired results.
Editing The Low Frequency Layer
Frequency separation is a technique used in Photoshop to separate the high frequency layer (texture and detail) from the low frequency layer (color and tone). Editing the low frequency layer allows for precise adjustments without affecting the texture and detail of the image.
It is a powerful tool for retouching portraits and other images.
Advanced Retouching Techniques
Discover the power of frequency separation in Photoshop and learn how to use this advanced retouching technique. With frequency separation, you can easily separate the frequencies of an image to retouch different elements individually, such as smoothing skin without affecting texture.
Enhance your photo editing skills with this effective method.
Frequency separation is an advanced retouching technique in Photoshop that can help you remove blemishes and imperfections from your images. It involves separating the high and low frequencies of an image, allowing you to work on each element individually. To use frequency separation in Photoshop, you will need to duplicate the background layer twice, add Gaussian blur to the bottom layer, and apply the image to the top layer. Change the blend mode of the top layer to Linear Light, and you are ready to start retouching! You can also use dodging and burning to add depth to your images. With these techniques, you can achieve a more professional and polished look for your photos.
Frequency Separation For Various Photography Genres
Frequency separation is a powerful technique for retouching images. It is widely used in portrait photography to enhance skin texture and in landscape photography to adjust specific areas without affecting the overall image. With frequency separation, you can separate the texture and color of an image, making it easier to edit specific elements. In portrait photography, it allows for smoothing skin while retaining natural tones. For landscape photography, it enables adjusting textures while preserving colors. The technique involves creating high and low-frequency layers, each targeting different aspects of the image. This flexibility makes frequency separation a valuable tool for various photography genres, offering precise control over image details.
Final Touches And Exporting
When you’ve completed your retouching, it’s essential to review your work before proceeding. Zoom in and out to ensure that everything looks natural and seamless. Next, consider saving and exporting your work for different mediums. For web use, save your file as a JPEG with a high quality setting. If you’re printing, it’s best to export as a TIFF to maintain the highest quality. Always consider the end use when exporting your images to ensure they look their best in any medium.
Frequently Asked Questions
How Do I Do Frequency Separation In Photoshop?
To do frequency separation in Photoshop, follow these steps: 1. Duplicate the background layer twice. 2. Apply Gaussian blur to the bottom layer. 3. Select the top layer and open the Apply Image dialog box. 4. Click OK. 5. Change the blend mode of the top layer to Linear Light.
This technique allows you to separate the texture and color of an image, making it easier to retouch specific areas while maintaining overall image quality.
Can You Do Frequency Separation On Photoshop Ipad?
Yes, you can do frequency separation on Photoshop iPad by using the Apply Image dialog box and layer blending modes.
What Is Frequency Separation For Landscape Photography?
Frequency separation for landscape photography separates texture from color and brightness, allowing targeted adjustments for a smoother, more refined look.
What Is The Mixer Brush In Photoshop Frequency Separation?
The mixer brush in Photoshop frequency separation allows you to separate high and low frequencies in an image. It helps you work on each element individually, smoothing skin and adjusting color and tone without affecting the texture. It is a powerful tool for retouching and enhancing images.
Conclusion
Frequency separation is a powerful technique in Photoshop that allows you to retouch images with precision and control. By separating the high and low frequencies, you can address skin imperfections while maintaining texture and color. This method is widely used in portrait retouching, but it can also be applied to landscape photography.
With the right tools and knowledge, you can achieve professional-looking results. So, give frequency separation a try and elevate your photo editing skills to the next level.


