The complete color correction process in Photoshop involves adjusting colors to enhance images. It includes steps like neutralizing tones, balancing hues, and fine-tuning saturation.
Color correction in Photoshop is a crucial aspect of image editing to ensure accurate and vibrant colors. By following a systematic process, you can transform dull photos into visually appealing masterpieces. From adjusting white balance to tweaking individual color channels, each step plays a vital role in achieving the desired color balance.
Understanding the complete color correction process in Photoshop empowers you to bring out the best in your images and create stunning visuals that captivate viewers. In this blog, we will delve into the essential steps and techniques involved in mastering color correction using Adobe Photoshop.
Introduction To Color Correction In Photoshop
The complete color correction process in Photoshop is an essential skill for photographers and designers. Color accuracy is crucial for conveying the right mood and message in an image. This guide will cover the scope of color correction techniques in Photoshop, including the importance of color accuracy and the various tools and methods available for achieving optimal results. Understanding the complete color correction process in Photoshop will empower you to enhance your images and bring your creative vision to life.
Essential Tools For Color Correction
Color correction in Photoshop involves using essential tools like histograms and the eyedropper for precision. The process includes adjusting neutral values, removing color casts, and masking out skin tones. You can also apply saturation and hue, create curves adjustment layers, and use the gray eyedropper to find neutral grays. Additionally, one-click color correction options and quick fixes are available for efficient editing. The color correction process in Photoshop allows for the adjustment of white balance, highlights, shadows, and creative settings, ensuring consistent and accurate colors across all clips.
Setting The Stage: Preparing Your Image
The Complete Color Correction Process in Photoshop involves several crucial steps. One of the first steps is Setting the Stage: Preparing Your Image. In this phase, you need to focus on Creating a Non-Destructive Workflow to ensure that your adjustments are reversible. Another important aspect is Identifying Color Casts and Imbalances. This step involves recognizing any unwanted color tints or imbalances in the image, which will guide your correction process. By paying attention to these initial details, you can set the foundation for a successful color correction process.
Basic Adjustments: White Balance And Tonal Correction
Color correction is an essential part of photo editing, and Photoshop offers a variety of tools to make the process easier. One of the first steps in the color correction process is adjusting white balance. This can be done manually by adjusting the temperature and tint sliders or by utilizing auto correction features.
Once the white balance is adjusted, tonal correction can be addressed through adjustment layers. These layers allow for precise control over brightness, contrast, and color. Applying saturation and hue can also help enhance the overall tone of the image. A negative mask can be created to exclude specific areas from these adjustments.
Overall, the color correction process in Photoshop involves a combination of basic adjustments and more advanced techniques. With practice and experimentation, anyone can achieve professional-looking results.
Advanced Techniques: Working With Curves And Levels
Learn advanced techniques for color correction in Photoshop by mastering the Curves Adjustment Layer and fine-tuning with Levels for contrast. Start by adjusting neutral values, removing magenta and increasing blues. Use masking to protect skin tones and apply Hue/Saturation for further adjustments. Next, create a negative mask and apply a Curves Adjustment Layer for precise control over tonal values. For fine-tuning, use Levels to adjust dark and light colors and the Gray Eyedropper to find neutral grays. If auto color corrections don’t work, try using the Eyedroppers in the Curves Adjustment Layer. With these techniques, you can achieve professional color correction and grading in your images.
Targeted Corrections: Utilizing Masks And Layers
When it comes to color correction in Photoshop, utilizing masks and layers is essential for targeted corrections. Isolating areas with layer masks allows for precise adjustments, ensuring that only specific parts of the image are affected. Additionally, selective color adjustment strategies can be employed to fine-tune the overall color balance and enhance the visual impact of the photo. By mastering these techniques, photographers and designers can achieve professional-level results in their color correction process.
Color Grading For Mood And Impact
Color grading plays a crucial role in setting the mood and impact of an image. By applying creative color grading, you can achieve cinematic looks that elevate your visuals to a whole new level. The process involves meticulous adjustments to color balance, hue/saturation, and curves to bring out the desired tones and contrasts. Additionally, by mastering the art of masking, you can ensure that the skin tones remain natural and unaffected. It’s important to understand the nuances of different blend modes and gray points to precisely locate the white and black points in an image. These techniques, when applied with precision, can result in a compelling and visually captivating color correction process in Photoshop.
Final Touches: Sharpening And Output Considerations
Achieving the perfect color balance is crucial in the complete color correction process in Photoshop. The final touches involve sharpening details and considering the output to ensure a flawless result for your images.
| Final Touches: Sharpening and Output Considerations |
| Sharpening After Color Correction |
| After completing the color correction process in Photoshop, sharpening the image is crucial for enhancing the overall clarity and detail. Utilize the sharpening tools in Photoshop to refine the image further. Additionally, consider the specific output format for the image, whether it’s for web or print, as the sharpening settings may vary based on the intended final use. Experiment with different levels of sharpening to achieve the desired visual impact. |
| Preparing for Different Output Formats |
| When preparing images for various output formats, such as online platforms or printing, it’s essential to optimize the images accordingly. For web use, consider resizing and compressing the images to ensure fast loading times. On the other hand, for print, focus on maintaining the high resolution and color accuracy. By tailoring the output settings to the specific format, you can ensure that the final images are displayed as intended. |
Common Pitfalls And How To Avoid Them
| Avoid Common Pitfalls: Be cautious of overcorrection leading to color shifts. Ensure color consistency across various devices for accurate results. |
Practical Applications And Case Studies
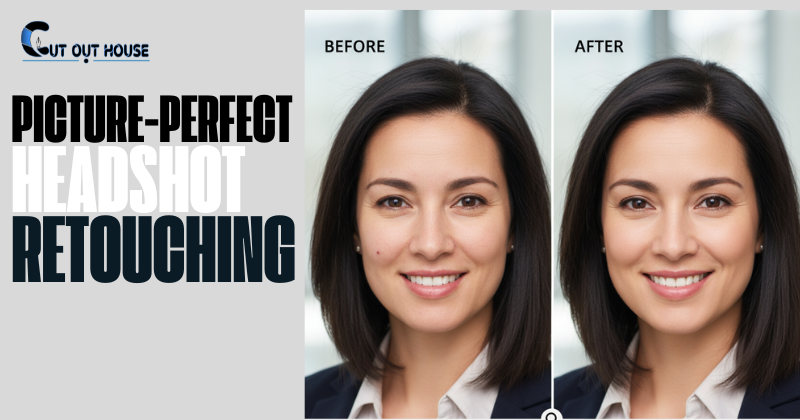
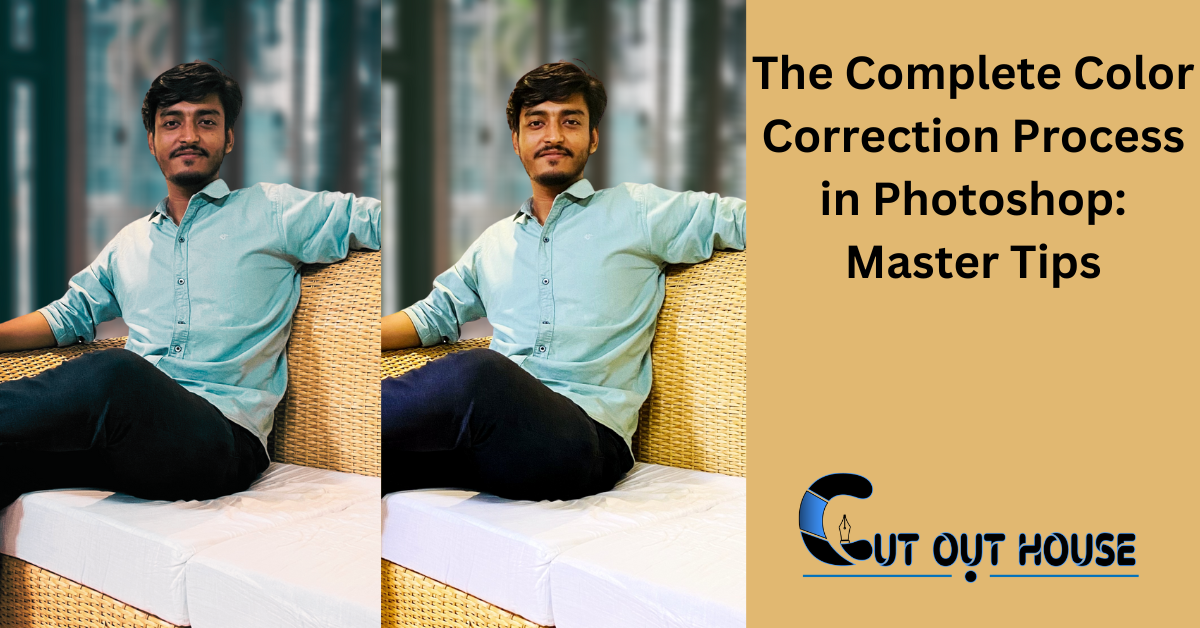
| The Complete Color Correction Process in Photoshop: Enhance your images with precise adjustments using tools like color picker, adjustment layers, and hue/saturation settings. Practical Applications and Case Studies: Discover real-world scenarios in which color correction transforms photos, evident before and after comparisons. |
Frequently Asked Questions
How To Do A Color Correction In Photoshop?
To perform color correction in Photoshop, adjust hues using tools like Curves and Hue/Saturation for accurate colors.
What Are The Steps To Color Correction?
To color correct in Photoshop: Edit all clips, choose Input LUT if needed, set white balance, adjust highlights/shadows, tweak creative settings, check colors clip by clip, fine-tune important hues. Color correction adjusts raw image data for a realistic look, not scientific accuracy.
Color correction in stage lighting enhances visual appeal.
What Is Color Correction Image Processing?
Color correction in image processing is adjusting raw data to make the picture look realistic, not scientifically accurate.
What Is Color Correction Function?
Color correction function adjusts colors in an image to achieve a more accurate and natural look. It’s used in photography, video editing, and graphic design to enhance visual appeal. This process ensures that colors are true to life and consistent throughout the project.
Conclusion
Mastering the color correction process in Photoshop is essential for enhancing your images. By following detailed tutorials and using various tools like adjustment layers and color pickers, you can achieve professional results. Practice and experimentation will help you develop your skills further.
Keep learning and refining your techniques!